We're Moving to WordPress

We're Moving to WordPress

I never thought I'd say this, but we're moving the blog from Blogger to WordPress! If things look a bit different around here, You're on WordPress now!

Thanks for being an awesome reader - more great content soon!

Ditch That Credit Card: Contactless Transactions Are the Future of Payments

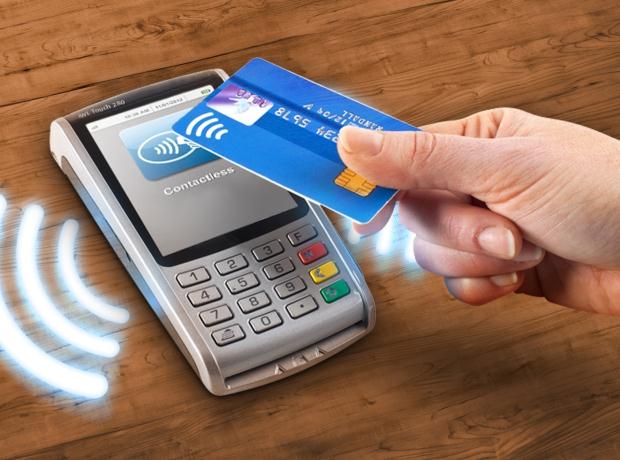
Before getting into the specific devices that are transforming the field of payment, it is first important to define and explain a crucial technology. NFC, which stands for Near Field Communication, allows for devices to exchange data without wifi, and at a close range. In terms of business transactions, this information comes in the form of bank accounts and other personal financial data.

Ditch That Credit Card: Contactless Transactions Are the Future of Payments

The greatest innovation concerning NFC is applying it not only to credit cards, but also to mobile devices. If you’ve ever walked into a coffee shop and seen someone just holding their phone straight in front of them at checkout, chances are high they are using their phone’s NFC technology to make a purchase. Companies like Level Up, Apple Pay, and Google Wallet are all popular examples of this contactless payment.

But if mobile contactless payment is already prevailing, what’s next? Well, that’s where new technology that’s derived from NFC comes into the picture. The very development of NFC is an improvement over a previous, contactless innovation: radio frequency identification (RFID) technology. Therefore, it is feasible that the next iteration of NFC will be a breakthrough in the realm of contactless transactions.

Contactless technology is just starting to emerge on new platforms like smart watches and clothing. For example, The Samsung Gear G2, which utilizes Samsung Pay technology, is a recent smartwatch product that focuses on contactless payment, while the Lyle & Scott bPay jacket incorporates NFC technology right in the sleeve cuff.

The next contactless technology could just be your very own body: hands-free transactions and technologies are being developed, with Google leading the pack by introducing an app called Hands Free. The goal is to be able to visit a participating retailer and check-out by stating your name to the cashier. A sensor then corresponds your name to the app’s database to confirm that you have the app downloaded and then it charges you on site. No credit card, no flashing a mobile phone or smartwatch - just simple vocalization and the transaction is complete.

With technological innovation always striving for greater efficiency, ease, and user satisfaction, it comes as no surprise that the realm of financial transactions is changing. Whether it’s with your phone, watch, jacket sleeve, or soon just your voice, the future of payment technology has arrived and the way you decide to pay is an ever-evolving decision.


Author : Rae Steinbach

fueled.com

Automatically Delete the Useless Photos From WhatsApp

WhatsApp is most popular platform for sending SMS, photos and video but after a month of usage it take lots of space in our mobile phone. We all have friends and relative who continuously forward us motivation quote and funny images they've received from their own network. If you're added in WhatsApp groups by friends, then you'll get tons of SMS, images or videos. You've an option to mute WhatsApp group but the downloaded images would still take up precious space on your mobile phone. 


How to Delete the Useless WhatsApp Photos Automatically

Either you can open the media folder of WhatsApp and delete the entire folder containing images but it delete all photos, or use a third party App called Magic Cleaner. 

Magic Cleaner App, scans the media folder of WhatsApp and automatically detects all the junk images including video screen grabs, cartoons, screenshots and other images with overlay text. It requires an active Internet connection because the photo analysis is done on Siftr servers and not locally on the mobile phone. 


Download and install the Magic Cleaner App from Google Play Store. Open Magic Cleaner and tap on me to start analyzing your photos. It will analysis 500 photos in single run and give an option to delete junk photos found. If you would like to delete more images, you can either need to invite a friend to use the app or wait for a day.

How to Restrict Windows 7, 8.1, or 10 Usage for a Specific Time

If you think that your kids are spending too much time on the computer, don't get off the computer and warning are not working anymore. It's a bit hard to set parental controls to local accounts and you can't let your kids mess up with your works by giving them the administrator account, with restrictions. You can use this simple trick to set a time frame that restrict to access Windows 7, 8.1 or 10 user account using the Command Prompt (CMD). 


How to Restrict Windows 7, 8.1, or 10 Usage for a Specific Time

Click on Start menu, type run and search for Command Prompt (CMD) and run as "Administrator". In the Command Prompt, type net user username / times: day, time

Replace username with the username of the account that you'd like to restrict the usage. Replace the day with the days that the user will be able to access his/her account, for this you can use initials like M, T, W, Th, F, Sa and Su. Replace the time with the time in which the user will be able to access Windows user account. 

For example : net user rahul /time: M-Sa, 8pm-9pm

You can also set a different time for different days by separating them using a semicolon.

net user rahul /time: M-W, 6pm-7pm; Th-Fr, 7pm-8pm; Sa-Su, 10am-12pm

Note : While setting time in 24-hour format, make sure that it should be in full hours (11:00 or 12:00). Half an hour (11:30 or 12:30) won’t work.

To give complete access to the user then type the following command

net user rahul /time:all

If you've any question, drop a line in comment box!

Best Time Saving Android Shortcuts

When it comes to getting things done on mobile, you can never be fast enough. Whether you're just getting started with Android device or a daily user, these are the Android shortcuts you should be using right now. 

Best Time Saving Android Shortcuts


#1. Reject calls with a text
On most Android phones, this option is available in the phone App > Settings > Call blocking > Quick responses. You'll see the call reject messages like "Can't talk now, What's up?", "I'll call you right back", "I'll call you later", "Can't talk now, call me later?" or you can edit custom message with your own writing style. 


#2. Quickly open the camera

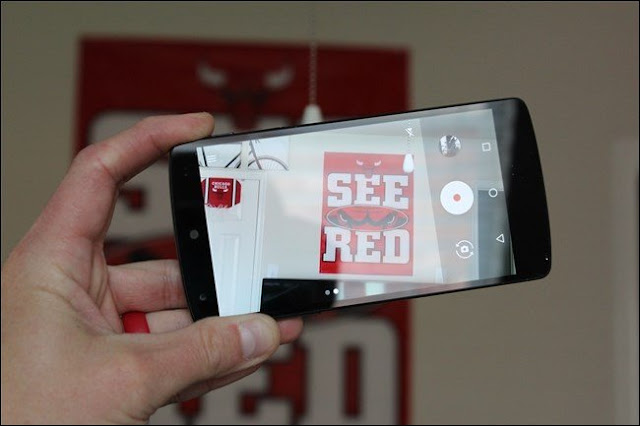
If you're running a Android 6.0 (Marshmallow), then you can launch the camera instantly by tapping the power button twice while the phone is asleep.
 

Nexus 5X or Nexus 6P: double-tap power button.
Samsung devices : double-tap the physical Home button.
LG V10: double-tap the volume down button.
Moto G 2015: twist your wrist with the device in hand.

#3. Bypass unlocking your phone

You can now set "Safe" locations in which your device will remain unlocked. Leave that zone, and your device will lock and require your security code or pattern to be entered.

Launch the Settings app > select Security from the list > tap Smart Lock followed by Trusted places.


#4. Add Contact Widgets
Press and hold on your Home screen, choose Widgets, and then look for the Contacts 1x1 widget. Tapping this shortcut loads a contact's details, letting you call, text, or email without scrolling through your address book.


#5. Enable "OK, Google" Everywhere

Open Google Now app by either swiping up on the home button or long pressing it, go to menu > Settings > select Voice and tap "OK Google detection", toggle the From any screen option on. Say the magic words three times and you're set. As a bonus, this little exercise will let you use the trusted voice option in Smart Lock.


#6. Refresh a Webpage

If you want to reload the current web page in Chrome browser, just tug down on the page. Once you've tugged hard enough, a spinning refresh icon will appear below the Chrome toolbar—and within a few seconds, the page will reload. 


#7. Do not disturb mode

You can silence incoming calls, chats, notifications and other alerts on any daily schedule your choose. Press and hold the volume down button in Android 6.0 Marshmallow, to activate "Do not disturb mode". To deactivate the Do not disturb mode, simply press and hold the volume up button. 


#8. Screenshot

To take screenshot, Just press hold the power and volume down buttons until you hear the "Click". In Android 6.0 Marshmallow, Press and hold the Home button to launch Now on Tap, then tap the Share button to the left of the Google button. 

#9. Fast typing
In Google keyboard, tap the "?123" button to get special character and number. If you want to capitalize a letter beyond the first character of a sentence, just double click on the caps-lock key (the up-facing arrow to the left of letter z). Long-press any number in Google keyboard to get a pop-up list of common fractions involving that figure. 

How to Recover data from Hard disk, USB flash drive or SD card

Hard drive crash or damage, usually include logical damaged and physical damage. The physical damage include scratches on platter, head wear, circuit board short circuit and chip burning. The logical damage includes partition table lost or damage, MBR damage, track servo information error, system information error and section logical error. 
How to Recover data from Hard disk, USB flash drive or SD card

This kind of damage is usually easy to be recovered by just adopting a professional and dedicated program. 


6 signs that may indicate a logical damage

1.A weird sound is coming from computer when it is started normally.

2.Data Error Reading Drive D:, General Failure Reading Drive C: or Sector Not Found error message appears and leads to boot failure, while virus infection is excluded.

3.Scandisk is automatically run to detect disk error each time when system is booted successfully.

4.When performing FDISK to hard disk, you find it was stuck in a certain point, going forward and backward repeatedly.

5.When you plan to format a partition on hard drive, the process is stuck in certain stage and error finally occurs, making you end up in failure.

6.Hard drive read error appears constantly when a file is reading or a program is running, suggesting file corruption and other information. Besides, if the disk reading process takes too long or the blue screen appears during reading, it also suggests that there’s bad sector/track on hard drive. 


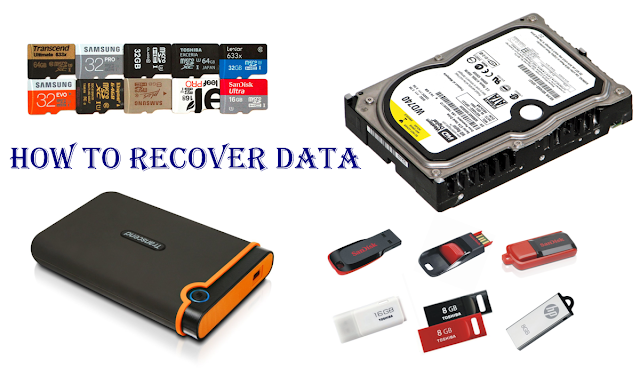
Testdisk data recovery software works on Windows, Linux and Mac and file system supported includes FAT, FAT12, FAT16, FAT32, exFAT, NTFS, NTFS5, HFS, HFS+, EXT2, EXT3 and EXT4. By using this Testdisk software you can recover data from USB flash drive (Pen drive), external and internal Hard disk, SD card etc. 


How to Recover data from Hard disk, USB flash drive or SD card

#1. Download Testdisk for Windows, Linux or Mac from here. Plug in your USB flash drive, SD card or External Hard disk.

#2. Extract the zip file and open the file called Photorec, (Run as Administrator) it will open a Command Prompt. 

#3. Now select a media, which you want to recover and press "Enter". 

Testdisk select a media


Note : If you see the message "Please select the partition table type", you need to select Intel for Windows and press Enter. 

#4. You will see "To recover lost files, PhotoRec need to know the filesystem type where the file were stored", choose other for Windows and Mac and ext2/ext3 for Linux, press Enter.   


Data recovery software free

#5. Next you'll see "Do you want to save recovered files in....", type Y and press Enter. 

Recover your Hard disk, sd card, pen drive

#6. The software recovering the files and save it to the destination folder. It will take around 10 min for 8 GB Pen drive to recover data. 

If you've any question, please drop a line in comment box.

How to Install OTA Update in Android Without Losing Root

By default, Android doesn't give you access to the root account which function like the Administrator account on Windows. Rooting is the process of enabling access to the root account, that enable you to install unapproved apps by Google, update the OS, replace the firmware, overclock or under clock the processor etc. Android OTA updates will refuse to run on rooted devices, if you update the Android device to latest version it will restore partition back to its factory state and removing the su binary. 

How to Install an Android OTA Update Without Losing Root

Step 1. When you get notification that there's an update available for your device, download it but don't install it. 

Step 2. Download and install the latest version of FlashFire beta, it should automatically detect the update file and ask if you want to generate the actions to flash it. Go ahead and click "OK".

Note : If you've a custom recovery like TWRP installed in your Android device, FlashFire will back it up before starting the process, and restore it afterwards. 


Step 3. Click the "Flash" button, it will shows a warning that it can take a bit of time for FlashFire to load, and a couple of black screen may appear, go ahead and tap "OK" again. 


Step 4. Now FlashFire will reboot and you'll see a myriad of scrolling text on the display. When it finished, it will reboot again with the update flashed and root restored. 

What to do, if Flashing the OTA update will Fail

Download the factory image for your device and copy the image's.tgz file to your phone's internal storage or SD card. Open FlashFire and select "Flash firmware package", a pop up windows will open and select the file you just move into internal storage or SD card. 

Now FlashFire will scan the archive to verify its contents, if you've a custom recovery and want to keep it that way, simply de-select the "recovery" option. Once you're ready to flash, just tap the checkmark in the upper right corner. You'll again be presented with the list of actions before it proceeds as described in the step 2.

Complete Guide for Tax Savings by Donating a Car in United States

Don't know how or where to donate a car? our primary purpose is helping America's donors make informed giving decisions when they part with their hard-earned dollars by writing a check to charity. In recent years, however, more and more donors are attempting to help themselves, and help others, by donating their used automobiles to charity.

Complete Guide for Tax Savings by Donating a Car in United States

How car donation tax deduction works
 
Donating Your car to charity can result in significant tax savings if you include it in your charitable contribution deduction. However, doing a little planning will ensure that you maximize the tax savings of your donation. The Internal Revenue Service (IRS) requires you to calculate your deduction in one of two ways, depending on how the charity uses your donation. Deductions for cars the charity sells are limited to the sales price. In all other cases, you can use the car's fair market value.

The IRS allows the taxpayer to claim a charitable tax deduction as follows:
  • If the donated vehicle is sold for less than $500, you can claim the fair market value of your vehicle up to $500 or the amount it is sold for if less than fair market value.
  • If the donated vehicle sells for more than $500, you can claim the exact amount for which the vehicle is sold.

By following 8 Non-Profit Charitable Auto Donations tips, you can minimize that risk, and maximize the amount that actually gets to charity. 

#1. Find a Charity That Directly Accepts Car Donations

If at all possible, avoid the for-profit intermediary organizations that advertise so pervasively to handle your car donations. When you work with one of these organizations, they keep the vast majority of the dollars created from your donation. If you can find a charity that handles the transaction themselves, they can keep 100% of their profits. It's possible that the charities you already support have a car-donation program that you don't know about. Check with them first.


Note : You're making a charitable donation, and don't simply give your automobile away to any charity, just because they're a charity. Do a little research, and find a high performing charity that does the kind of work you like, in the region you wish to target and does that work well.

#2. Drive the Car to the Charity, if it Runs

Worthy charities are going to have to pay someone else to handle a pick-up or a tow. This is yet another cost that cuts into the amount that gets to that organization's programs. If you can get the car to them yourself, do it.


#3. If You Have to Use a Intermediary Agency, Research the Percentage that Gets to Charity

The IRS does not require the car donation agencies to contribute a set amount of the auto's proceeds to the intended charities; that amount is negotiated between the charities and the handlers. Try to find an agency that maximizes that amount, and call the charity to confirm that number before you give. The charities are reluctant to criticize the middlemen, because they don't want to lose the dollars they do receive, but state attorney generals are beginning to investigate and even prosecute these for-profit middlemen, for holding themselves out as charities and misleading the public on the amount that is actually reaching charitable causes.

#4. Your Intended Organization is a 501 (c) (3)

While many organizations can claim non-profit status, donations to 501 (c) (4) organizations are generally not tax-deductible. These are political organizations with permission to lobby our government; like Disabled American Veterans or the National Rifle Association. Make sure your intended recipient has 501 (c) (3) public charity status.


#5. Transfer the Car Correctly to the Charity

Some charities will ask you to leave the assignment of ownership space on the charity donation papers blank, so they don't have to re-title the auto. If your charity asks this of you, find another charity. If you don't formally sign your car over to the designated nonprofit, you will be held responsible for any parking tickets that are subsequently incurred, or liable if it's used in a crime. Remember, the charity you give the car to will probably not use your car to deliver meals to the needy, but will simply sell it as quickly as possible. When someone buys it from them at auction and doesn't bother to register that car, it's still yours in the eyes of the law.

#6. Value Your Car Correctly

American Jobs Creation Act of 2004 which prevented taxpayers from simply deducting the published fair market value of vehicles worth more than $500. Instead, the deduction is determined once a car is sold and the charity sends the donor a receipt indicating the exact amount the car garnered at auction.


#7. Find out how much the charity sold the car for

Use the price the charity obtains for your car in a sale as the amount of your deduction. For example, if the charity sells the car at auction for $3,000, your deduction is limited to $3,000, even if the fair market value is $4,500. However, if the charity sells the car at a discount to a needy individual or keeps the car for its own internal use, then you can claim a deduction for its fair market value.


#8. Complete Your Paperwork

Non-cash donations are the most common triggers of audits, so it is important to keep thorough documentation of a car donation. Specifically, if your car is valued over $250, then you need to obtain and retain a written acknowledgement from the charity. Additionally, if your car is worth more than $500, you must complete section A of the IRS Form 8283 and attach it to your yearly taxes. Furthermore, if your car is worth over $5,000, then you must have an independent appraisal and fill out section B of IRS Form 8283.


#9. Claiming the deduction

Report the amount of your deduction on line 17 of Schedule A. Since you can only claim a deduction for your car donation if you itemize, the total of all your eligible expenses on Schedule A must exceed the standard deduction amount for your filing status.

If you use TurboTax to prepare your taxes, we’ll help you determine which filing status will get you the biggest tax savings.

#10. Use Fair Market Value (FMV) for the Car

There are several exceptions which allow you to use the Kelley Blue Book or a NADA guide, but you must use the FMV, not simply the highest value listed for the year and make of your car. Use the FMV when:

  • Instead of selling the vehicle, the charity keeps and uses it, the charity makes improvements to the car before selling it.
  • Our car is sold at a discounted price to a person with a low income, or if the car is worth less than $500.

Otherwise, you can only deduct the amount that the charity sells the car for at auction as indicated on the written receipt the charity sends you.


#11. Additional forms you'll need

Complete Form 8283 if your car donation deduction is more than $500. If your deduction is between $501 and $5,000, you must complete Section A. If your deduction is greater than $5,000, you must complete Section B. If you complete Section B, you must also obtain a written appraisal as documentation.

Again, if you use TurboTax, we’ll ask simple questions and fill in all the right forms for you.

Tips :

  • If the charity sells your car sells for $500 or less, you can deduct $500 or your car’s fair market value, whichever is less. For example, if your car is valued at $650 but sells for $350, you can deduct $500.
  • Most charities will report the sales price of your car to you on Form 1098-C.
Warnings :
  • You must have documentation of your donation. At a minimum, the documentation you receive from the charity must include your name, the vehicle identification number, the date of your donation and a statement describing the goods and services you received, if any.
For more information, please see IRS Publication 4303, A Donor's Guide to Vehicle Donations.

How to Reduce Internet Data Usage in Android Mobile Phone

Mobile Internet service providers companies are advertising unlimited data plans but in most cases they have a limit of 2GB.  Most of the user were surprised, when they get a sms "Mobile data is low", even they don't use huge amount of data on their Android Mobile Phone. There are many reasons like data hungry application installed in mobile, uploading high resolution images to Facebook, running background apps, auto-updating apps etc. 
How to Reduce Internet Data Usage in Android Mobile Phone
In Android mobile phone, thanks to plenty of data-restricting settings. With the proper configurations, you'll find yourself using data at a much slower rate. 

#1. Restrict Background Data

Background data means Internet data used by apps when you're not actually using an app such as email syncing, feeds updating, weather widgets and so on. To restrict background data in Android for all apps, go to Settings > Data Usage > Restrict Background Data or for individual apps in Settings > Apps (depending on which version of Android you have). 


You can also change your sync settings for Google services in Settings > Accounts > Google > select the account and then un-check the services you don't want to sync automatically.

Restrict Background Data in Android


#2. Compress Chrome Browser Pages

Just launch Chrome, tap the three dots in the top right corner, go to Settings and click on "Data Saver". This alone can save you 30-35% of your mobile browser data consumption.


 Compress Chrome Browser Pages in Android


#3. Update apps on Wi-Fi only

Go to Google Play Store, tap Settings > Auto-Update Apps tap either "Do not auto-update apps" or "Auto-update apps over Wi-Fi only". To manage individual apps, go to My Apps, select an app and then tap menu to check or un-check Auto-update.


Update apps on Wi-Fi only Android Settings

#4. Opera Browser Video Compression

If you're frequently watching video, simply download the Opera browser, go to Settings > Data Savings and tick the box that says "Video Compression". This setting not only saves you data, but also videos are more likely to load faster. 


#5. Download Opera Max

Opera Max encrypts data for all apps on your device when you’re connected to a mobile data network. Install the app and it will take over, routing all apps’ traffic through Opera’s servers so it can be compressed to save your data allowance.
Opera Max can also compress videos in addition to photos, web pages, and other types of data. 


This application also provides you with an overview of the apps using data and allows you to block them from using that precious data. This service is free, and is the best solution for compressing your Android phone’s data usage. To “recharge” Opera Max, you’re asked to occasionally watch an advertisement — that’s the price of a free service.

#6. Uninstall Facebook App

Facebook is one of the biggest consumers of data, so uninstall it. Just open Facebook in Chrome, open the overflow menu and select "Add to Home Screen". You can use this home shortcut to open the Facebook directly without using any app.


#7. Identify And Remove High Data Consuming Apps

Go to Settings > Data Usage, you can get a look at the apps which are consuming the most data both in the foreground and background. Just remove the apps which you don't find useful and consuming more data. 


#8. Avoid High Quality Streaming Content

Either you can store music and video into your mobile phone or stream video in low quality. Go to settings and set quality at lower rates likewise you can decrease resolution in YouTube and other video streaming apps.


#9. Cache or Preloaded Data

You can use an app like Pocket to save interesting web pages and access them later anytime you like without needing an Internet connection.

Fire up the Google Maps app when you’re connected to Wi-Fi and select the area you want to save then tap Menu > Make available offline or go to Maps > My Places > Offline and tap New offline map before selecting the area you want. You can also review your offline maps via Maps > My Places > Offline.

You can try Nokia's map to get a navigation that does offer offline turn by turn directions. 


#10. Download Gmail attachments on Wi-Fi

Google allows you to automatically download Gmail attachments over Wi-Fi. If you’re a daily user of the Gmail app, this toggle could help you save big on network data!

To enable this setting:

Gmail menu > Settings > youremail@gmail.com > (Data Usage) Download attachments.


Download Gmail attachments on Wi-Fi in Android


#11. Disable Auto-Play Video on Facebook

To avoid unintentionally downloading these videos:

Facebook Left Navigational Panel > Settings > (General Settings) Auto-Play videos on Wi-Fi only 


Disable Auto-Play Video on Facebook in Android Phone


#12. Some More Tips
  • Use "YouTube offline" service whenever you want to watch a particular video multiple times.
  • Don't clear System Cache.
  • Stop using Task Killers because some task killers dump the cache of apps the kill.
  • Turn off Mobile Data when Not in use.
  • While streaming in youtube Ensure that you are watching videos in SD quality. follow this steps below to enable this setting. Touch Youtube Menu> Settings>General>Limit Mobile Data Usage> keep it Selected.
  • Download data in advance whenever you get free wi-fi.
Do you know, any other tips for reducing data usage on Android? Let us know in the comments.

How to Search Twitter Like a Pro

People send more than 2500 new tweets posted every second and 500 million tweets every single day. Twitter makes it easy to navigate those tweets and find the info that's most valuable to you. These results are determined by Twitter's search algorithms, as are the "Top" tweet results. You can write simple search queries (like #IPL) or more complex query (like Modi min_retweets:5filter:news) that uses one or more Twitter search operators. 

How to Search Twitter Like a Pro


How to Search Twitter like a Advanced User

You can use the following search operators that can help you perform more accurate searches on Twitter.

#1. All tweets sent by particular Twitter user
 

From:NarendraModi

#2. Tweets sent in a particular time range

Windows Reviews since:2016-03-01 until:2016-04-05


#3. Tweets sent to Narendra Modi but not containing any links
 

to:NarendraModi-filter:links

#4. Tweets containing YouTube videos that are described as funny or amazing

YouTube funny or amazing filter:links


#5. Search for tweets from users who belong to a particular Twitter list

election list:Time/time-staff


#6. Search tweets for a particular hashtag but containing images

#IPL filter:images


#7. Tweets containing YouTube videos that are favorited by atleast 200 users

youtube.com min_faves:200


#8. Search tweets that mention a keyboard and contain links to news websites

Narendra Modi filter:news


#9. Tweets that have been retweeted atleast 20 times

bollywood min_retweet:20


#10. Tweets from user @Neha that mention user @Akash but exclude Retweets

from:neha to:akash-RT


#11. Tweets sent by users within the 20 mile radius of New Delhi containing Android Phone

Android near:ND within:20mi


#12. Filter tweets containing adult or potentially sensitive content

Android games filter:safe


#13. Tweets sent in a particular language (en=English)

#iPhone lang:en


#14. Show tweets that contain native video i.e. uploaded inside tweet

gadgets show filter:native_video


#15.  Search discovery tweets containing images or videos

discovery filter:media

7 Ways to Enable Right Clicking on Website That Block It

Some sites like IMDb uses JavaScript or an HTML attribute to disable right-clicking on their pages. Here are some methods, which giving you the ability to right click, select text or perform other actions forbidden by a given website. 
7 Ways to Enable Right Clicking on Website That Block It


How to Enable Right Clicking on Website that Disabled It


#1. Javascript Code 

Navigate to the website that has disabled the right click feature, then copy paste the code given below in the URL bar. You've to repeat the same step every single time you want to use a right click. 

javascript:void(document.oncontextmenu=null);


#2. Disable JavaScript from the Browser 


In Google Chrome, go to Setting > UnderHood Tab > Content Settings or enter  chrome://settings/content  and click on "Do not allow any site to run JavaScript", click done.

Similar settings are available in other web browsers like Mozilla Firefox, Internet Explorer or Edge etc. 

#3. Website Source Code 

Press Ctrl + U on the website page to view its source code, here you can find the images, video or text link. 

#4. Save the Webpages 

Press Ctrl + S to save a webpage in HTML only which disable right click on their page. Once the page is saved, open the saved webpage in default browser and use right click to copy images, text and video file etc. 

#5. Use a Web Proxy 

Visit FilterByPass website or HideMyAss and check the option "Remove Script", now search the surf the website which disable right click on their page. 

#6. Browser Extension 

Install a extension called RightToCopy in Google Chrome, or Mozilla Firefox which help you get back right click feature.

#7. Print Preview 

Surf the website which disable right click, press Ctrl + P and then copy the text you need from the print preview. 

How to Block Any Website on PC, Phone, Browser or Network

There are many websites that might be spreading viruses, malware, try to steal your personal data or contain explicit content not suitable for children. You need to block, these websites for the safety of your device and family members. 

How to Block Any Website on PC, Phone, Browser or Network

Here's step by step guide to restrict access of these websites. 


How to Block a Website in Android Device

Download and install ES File Explorer from Google Play Store. Open ES File Explorer, tap the '/' button at the top > System > etc. 

You'll see the host file, click on it and open it in ES note editor. Now click the three dots button in the top right and tap edit. 

Start a new line and type "127.0.0.1 www.blockawebsite.com", just replace blockawebsite with the website name you want to block. Reboot your Android device to save changes. 


How to Block a Website in iOS Device

Go to Settings > General > Restrictions, click on enable restrictions and set a passcode. After the passcode is set, scroll down and tap websites. Here you can either choose to limit adult content or allow access to specific websites only. 

If you try to access a blocked website, you see a message displaying it is restricted. Tap the Allow Website and key in the Restrictions passcode to open that website.

How to Block a Website in Windows PC

Open Windows Explorer and navigate to C:\Windows\System32\drivers\etc. Double click on hosts file and open it in Notepad. Place the cursor at the end of the last line and press Enter to create a new line. 

How to Block a Website in Windows PC

Type "127.0.0.1 www.facebook.com", just replace facebook with the website name you want to block and click file, save to commit to your changes.

How to Block a Website in Mac

Open Terminal (/Applications/Utilities/Terminal), type sudo nano/etc/hosts and press enter. This will open the hosts file in text editor, type the website name you want to block in this format "127.0.0.1 www.facebook.com", press Ctrl + X and then Y to save changes.  

How to Block a Website in Browser

In Firefox or Google Chrome, install an addon BlockSite. Press Ctrl + Shift + A and click extension on the left, click options under BlockSite. In the pop-up, click add and type the name of the website you want blocked, click 'OK'.

In Internet Explorer, go to tools > Internet Options. Click security tab and then tap the red restricted sites icon, click the site button below the icon. Now in the pop-up, manually type the website you want to block one by one, click 'OK'. 


How to Block a Website on Your Network

Open any browser and type any 192.168.1.1, in the address bar, press enter. Some router use a different address, so if this doesn't work, check your documentation provided by your ISP. Enter the username and password, navigate to Access Management > Filter > URL Filter and typed the website you want to blocked, hit save. 

How to Block a Website on Your Network


You can create 16 lists of blocked websites, each containing 16 websites, using this method, letting you block up to 256 websites. Again, this will vary from router or router.

How to Download YouTube Videos Using VLC Media Player

VideoLAN (VLC) is probably the most popular video player due to its amazing ability to play almost any code you want. Most of the people use VLC for playing video and audio files only but you can download YouTube videos without using any website or software. 
How to Download YouTube Videos Using VLC Media Player

How to download YouTube videos using VLC

Find a video on YouTube like this and copy the URL from the address bar. Open VLC, go to Media > Open Network Stream (Ctrl + N) and paste the YouTube link in the box and click play.

Open Network Stream VLC

Find Codec information (Ctrl + J) under Tools and copy the link from box says Location. 

Codec Information VLC


Go back to your browser and paste the link in the address bar. This will open the source file directly on YouTube's servers. Right click the video as it plays, select Save Video as, it will download the file in browser or download manager. 

Note : You can also record clips from YouTube videos as they're streaming in VLC by pressing the Red Record button in the player itself. 

How to Hide Favorites, Frequent Folders and Recent Files in Windows 10

In Windows 10, when you open File Explorer, by default it shows 'Favorites', 'Frequent Folders', and 'Recent Files'. All over Windows, you'll see menus with the most recently used items for a given application, documents, or some videos you recently watched. Frequent folder showing you important folders in your account such as downloads, documents, pictures, music and folders you've pinned or accessed recently. 

How to Hide Favorites, Frequent Folders and Recent Files in Windows 10


If you don't want to see them in File Explorer, you can easily hide them, here is how.


How to Hide Favorites, Frequent Folders, and Recent Files on Windows 10

Open File Explorer by click on Start > File Explorer ( Win + E ) and click View > Options. In the Folder Options dialog windows, under General tab, choose 'This PC' and uncheck the following boxes.
  • Show recently used files in Quick access.
  • Show frequently used folders in Quick access.

Recent Files in Windows 10


Now click on apply and tap on 'OK' to save the changes. 

Note : To delete recent files shortcut, press Win + R and open run command, type recent and select all items by pressing Ctrl + A, hit enter. 

To turn off recent items and frequent places in Windows 7 and 8.1 follow the steps given below.

In Windows 7, right click or press and hold on a empty area on the taskbar and click properties. This will open Taskbar and Start Menu Properties, click on Start menu and uncheck the box displaying "Store and display recently opened program in the Start menu" and Store and display recently opened items in the Start menu and the taskbar". 


Recent Items and Frequent Place in Windows 7

In Windows 8.1, right click or press and hold on a empty area on the taskbar and click "Properties". In the Jump List, uncheck the box displaying "Store recently opened program" and "Store and display recently opened items in Jump Lists". 


Recent Items and Frequent Place in Windows 8.1