Windows 10 is the latest OS from Microsoft and comes with some great features and is available for upgrade from Windows 8.1 or Windows 7. Now, there are many cases where your Windows 10 installation might have issues booting or it might have crashes or even system files getting corrupted. If you run into problems with your PC, a USB recovery drive can help you troubleshoot and fix those problems, even if your PC won’t start.
If you have bought a new PC, it might have come with a recovery image that’s used to refresh or reset your PC. The recovery image is stored on a dedicated recovery partition on your PC, and is typically 3-6 GB in size. To save space on your PC, you can delete the recovery image from your PC and use a recovery drive instead. Windows 8.1 includes a built-in tool to create a USB recovery drive. Windows will let you know how big the recovery partition is, and you’ll need a USB flash drive at least that big.
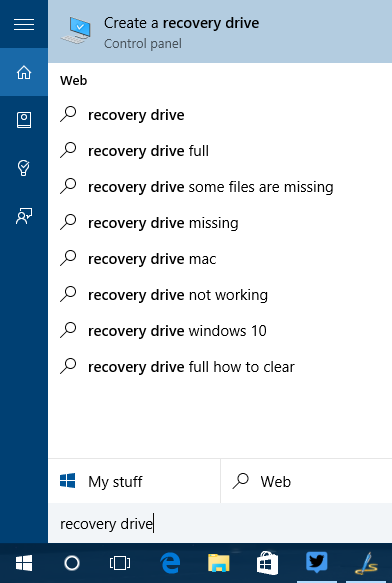
To create a recovery partition, click the start menu and type recovery drive. You will see the option in the control panel.
Once you click this, it will open the wizard to create a recovery drive. Here you can either create a recovery drive to troubleshoot or backup system files so that you will be able to reinstall Windows.

Click next and you will shown the size of the USB drive you need to create the recovery partition. Insert the USB drive, make sure that you have backed up all the files in USB drive as it will be deleted when the recovery drive is created.
Once the process is complete, you can use this drive to fix issues in Windows 10.
How to Create a Recovery Drive in Window 10
If you have bought a new PC, it might have come with a recovery image that’s used to refresh or reset your PC. The recovery image is stored on a dedicated recovery partition on your PC, and is typically 3-6 GB in size. To save space on your PC, you can delete the recovery image from your PC and use a recovery drive instead. Windows 8.1 includes a built-in tool to create a USB recovery drive. Windows will let you know how big the recovery partition is, and you’ll need a USB flash drive at least that big.
To create a recovery partition, click the start menu and type recovery drive. You will see the option in the control panel.

Once you click this, it will open the wizard to create a recovery drive. Here you can either create a recovery drive to troubleshoot or backup system files so that you will be able to reinstall Windows.

Click next and you will shown the size of the USB drive you need to create the recovery partition. Insert the USB drive, make sure that you have backed up all the files in USB drive as it will be deleted when the recovery drive is created.
Once the process is complete, you can use this drive to fix issues in Windows 10.