Showing posts with label Mac. Show all posts

How to Recover data from Hard disk, USB flash drive or SD card

Hard drive crash or damage, usually include logical damaged and physical damage. The physical damage include scratches on platter, head wear, circuit board short circuit and chip burning. The logical damage includes partition table lost or damage, MBR damage, track servo information error, system information error and section logical error. 
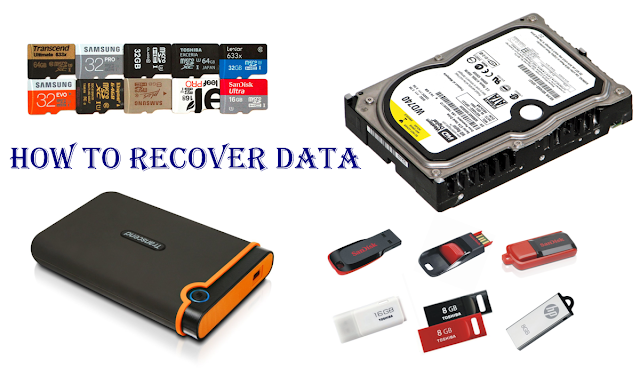
How to Recover data from Hard disk, USB flash drive or SD card

This kind of damage is usually easy to be recovered by just adopting a professional and dedicated program. 


6 signs that may indicate a logical damage

1.A weird sound is coming from computer when it is started normally.

2.Data Error Reading Drive D:, General Failure Reading Drive C: or Sector Not Found error message appears and leads to boot failure, while virus infection is excluded.

3.Scandisk is automatically run to detect disk error each time when system is booted successfully.

4.When performing FDISK to hard disk, you find it was stuck in a certain point, going forward and backward repeatedly.

5.When you plan to format a partition on hard drive, the process is stuck in certain stage and error finally occurs, making you end up in failure.

6.Hard drive read error appears constantly when a file is reading or a program is running, suggesting file corruption and other information. Besides, if the disk reading process takes too long or the blue screen appears during reading, it also suggests that there’s bad sector/track on hard drive. 


Testdisk data recovery software works on Windows, Linux and Mac and file system supported includes FAT, FAT12, FAT16, FAT32, exFAT, NTFS, NTFS5, HFS, HFS+, EXT2, EXT3 and EXT4. By using this Testdisk software you can recover data from USB flash drive (Pen drive), external and internal Hard disk, SD card etc. 


How to Recover data from Hard disk, USB flash drive or SD card

#1. Download Testdisk for Windows, Linux or Mac from here. Plug in your USB flash drive, SD card or External Hard disk.

#2. Extract the zip file and open the file called Photorec, (Run as Administrator) it will open a Command Prompt. 

#3. Now select a media, which you want to recover and press "Enter". 

Testdisk select a media


Note : If you see the message "Please select the partition table type", you need to select Intel for Windows and press Enter. 

#4. You will see "To recover lost files, PhotoRec need to know the filesystem type where the file were stored", choose other for Windows and Mac and ext2/ext3 for Linux, press Enter.   


Data recovery software free

#5. Next you'll see "Do you want to save recovered files in....", type Y and press Enter. 

Recover your Hard disk, sd card, pen drive

#6. The software recovering the files and save it to the destination folder. It will take around 10 min for 8 GB Pen drive to recover data. 

If you've any question, please drop a line in comment box.

How to Block Any Website on PC, Phone, Browser or Network

There are many websites that might be spreading viruses, malware, try to steal your personal data or contain explicit content not suitable for children. You need to block, these websites for the safety of your device and family members. 

How to Block Any Website on PC, Phone, Browser or Network

Here's step by step guide to restrict access of these websites. 


How to Block a Website in Android Device

Download and install ES File Explorer from Google Play Store. Open ES File Explorer, tap the '/' button at the top > System > etc. 

You'll see the host file, click on it and open it in ES note editor. Now click the three dots button in the top right and tap edit. 

Start a new line and type "127.0.0.1 www.blockawebsite.com", just replace blockawebsite with the website name you want to block. Reboot your Android device to save changes. 


How to Block a Website in iOS Device

Go to Settings > General > Restrictions, click on enable restrictions and set a passcode. After the passcode is set, scroll down and tap websites. Here you can either choose to limit adult content or allow access to specific websites only. 

If you try to access a blocked website, you see a message displaying it is restricted. Tap the Allow Website and key in the Restrictions passcode to open that website.

How to Block a Website in Windows PC

Open Windows Explorer and navigate to C:\Windows\System32\drivers\etc. Double click on hosts file and open it in Notepad. Place the cursor at the end of the last line and press Enter to create a new line. 

How to Block a Website in Windows PC

Type "127.0.0.1 www.facebook.com", just replace facebook with the website name you want to block and click file, save to commit to your changes.

How to Block a Website in Mac

Open Terminal (/Applications/Utilities/Terminal), type sudo nano/etc/hosts and press enter. This will open the hosts file in text editor, type the website name you want to block in this format "127.0.0.1 www.facebook.com", press Ctrl + X and then Y to save changes.  

How to Block a Website in Browser

In Firefox or Google Chrome, install an addon BlockSite. Press Ctrl + Shift + A and click extension on the left, click options under BlockSite. In the pop-up, click add and type the name of the website you want blocked, click 'OK'.

In Internet Explorer, go to tools > Internet Options. Click security tab and then tap the red restricted sites icon, click the site button below the icon. Now in the pop-up, manually type the website you want to block one by one, click 'OK'. 


How to Block a Website on Your Network

Open any browser and type any 192.168.1.1, in the address bar, press enter. Some router use a different address, so if this doesn't work, check your documentation provided by your ISP. Enter the username and password, navigate to Access Management > Filter > URL Filter and typed the website you want to blocked, hit save. 

How to Block a Website on Your Network


You can create 16 lists of blocked websites, each containing 16 websites, using this method, letting you block up to 256 websites. Again, this will vary from router or router.

How to Migrate from Evernote to Apple Notes

A new feature in the most recent update to OS X EL Capitan is the ability to migrating content from Evernote to Apple Notes. Here what you'll need to get started:
1. A Mac running OS X 10.11.4
2. Evernote for Mac
3. Notes on your Mac, just make sure you're signed in with your iCloud account. 


How to Migrate from Evernote to Apple Notes


How to Migrate From Evernote to Apple Notes

  • Install Evernote for Mac from the Mac App Store and log in to Evernote. 
  • To migrate everything all at once, click "Edit" at the top of your screen and tap "Select All". 
  • Click "File" at the top of your screen and tap the "Export Notes"
  • On next screen type in a file name, choose file location and select Evernote XML format for the format. 
  • Once you hit "Save" and see the "Export Complete" dialog, click 'OK'.
  • Now launch Notes and click 'File' at the top of your screen and tap 'Import Notes', select the file you saved from Evernote.  

Note : If you want only notebooks, you can right click a notebook in Evernote, select "Export" and the further process is same as described above.

21 Tricks in Google Chrome, You don't know

Google's Chrome browser is full of shortcuts, hidden features, and tweaks that can save your time and improve your workflow. 

21 Tricks in Google Chrome, You don't know

Here's a collection of 21 most useful tips and tricks for Google Chrome that will help you work faster and do more with your favorite web browser and You don't have to install any extension. 

#1. Enable Guest Browsing 

Someone wants to borrow your laptop, but you're not keen on him or her messing around with your Facebook account or seeing the URLs that come up as suggestions in the omnibox (URLs address). To enable Guest browsing, go to Settings > People > Enable Guest browsing. To switch to the guest account, click on your username (top right) then choose switch person and browse as Guest.

#2. Chrome Omnibox a Hidden Calculator 

You can perform quick calculations and even unit conversion right from the address bar (Omnibox), no Google search required. Type out a simple bit of math like "26 inches to feet" and hit Enter, to see answer. Temperature, distances and weights should all work natively just as they do from Google searches. 

#3. Save web pages as PDFs 


Open any web page, press Ctrl + P on Windows (or Cmd + P on Mac) and choose "Save as PDF" from the list of available printers to download the page as a PDF file. 

#4. Get Word definitions 

You can double click on a word inside Chrome, right mouse click and select "Search google for" to get a definition in a pop-up window.

#5. Assign Custom Keyboard shortcuts 

Google Chrome supports a variety of keyboard shortcuts but you can also assign your own custom shortcuts to launch various extension and Chrome apps. Type chrome://extensions in the browser's address bar to open the Extension page, scroll down to the bottom and click the link that says Keyboard Shortcuts. 


#6. Quick fix for slow Chrome

Go to More toos > Task Manager, it shows you a list of all the open tabs and the background processes running in the browser at the moment, along with the amount of system resources they're using up. Sort the list by Memory, select the websites and extensions that are consuming more memory and click End Process. 

#7. Switch to Google Cache 

When you're on a page, click the address bar, type cache: before the URL and hit Enter. You'll be redirect straight to the Google Cache, if there's one. 

#8. Remove embarrassing URLs 

When you type in the Chrome's address bar, the browser will suggest matching URLs from your web history. If there's any particular URL that you would not like to appear in the list of suggestions, you can easily remove it by clearing the history or from the address bar itself. Highlight any auto-complete URL in the drop-down list and press Shift+Delete to remove it permanently.

#9. Change Search Engine in the Omnibar 

Type amazon in the address bar and press tab, which will change the address bar to search amazon.com and type any keyword to seach in amazon website

#10. Open mobile website on slow Internet 

If you're on a slow Internet connection, you can pretend to be a mobile device and most websites will serve you mobile friendly versions that are often light in size. Open chrome developer tools, switch to Emulation tab and choose either Android or iOS as the User Agent. Make sure Screen and Device emulation is off.

#11. Use Chrome as a Media Player 

You can drag and drop files, videos, images, text files and PDF documents from your desktop into the Chrome tab and view them without opening a dedicated viewer application. 

#12. Text editor inside Chrome 

Open a new tab and paste  data:text/html,<html contenteditable> into the address bar. Click anywhere inside the tab and start typing. 

For larger font with more padding, use this code 

data:text/html, <body contenteditable style="font: 2rem/1.5 monospace;max-width:60rem;margin:0 auto;padding:4rem;">


#13. Send emails from the address bar 

Go to browser's address bar and type the mail to command like mailto:recipient@domain.com. This will open the Gmail compose window and auto-fill the address in the To field.

#14. Reveal all your Hidden Passwords 

Go to Developer tools, visually select the password field on the page and change the input type from password to text. You can also find your saved password under chrome://settings/passwords. 

#15. Fake your current location 

Go to tools > Developer Tools and press the Esc key to open the console, here switch to the Emulation tab and enter any value for latitude and longitude. 

#16. Install unapproved Chrome extensions 

Open the extension page of Chrome, turn on the Developer mode and drag-drop the extension (.crx file) into your Chrome. 

#17. Autofill Address 

Go to Settings > Options > Personal stuff > click on the check box "Enable autofill to fill out web forms in a single click > Click on Manager autofill settings > Click on 'Add new address' and enter the information. 

#18. Google Cloud Print 

Go to Settings > Options > Under the Hood > click on sign into “Google Cloud Print”.

Once you setup your printer using Google cloud print, you can print to it from anywhere. i.e You can print to it from your mobile, other PC at work, or any other system that is connected to the internet.


#19. Google Chrome browser shortcuts

Alt+F – Open chrome settings menu
Ctrl+J – Go to downloads window

Ctrl+H – Go to history window 
Ctrl+Tab – Navigate Tabs
Alt+Home – Go to home page
Ctrl+U – View source code of the current page
Ctrl+K – To search quickly in the address bar
Ctrl+L – Highlights the URL in the address bar (use this to copy/paste the URL quickly)
Ctrl+N – Open a new Chrome browser window
Ctrl+Shift+N – Open a new incognito window (for private browsing)
Ctrl+Shift+B – Toggle bookmark display
Ctrl+W – Close the current Tab
Alt+Left Arrow – Go to the previous page from your history
Alt+Right Arrow – Go to the next page from your history
Space bar – Scroll down the current web page
 

#20. Generate new password on sign up pages 

Type "about:flags" into the browser's address bar, find the option "Enable password generation" select enable and restart the Chrome. 

#21. Activate Flash on demand
 

If you want to improve stability of the browser, go to the browser’s Advanced Settings (chrome://settings/content) and choose the “Click to Play” option under Plugins. This disables Flash Player. Should you need to run the plug-in you can activated it on demand.

How to Rotate a Video 90 Degree on Android, iOS and Windows

When you captured a video with your smartphone or camcorder and try to play it in your computer or laptop, you find that it's rotated 90 degrees. If you find your video sideways or upside down then you know how frustrating it can be to watch it later. Luckily, rotating your video is a snap, and there are many free ways to do it. 

How to Rotate a Video 90 Degree on Android, iOS and Windows

How to Rotate a Video 90 degree on Windows or Mac 

#1. Windows Live Move Maker : Click on Start button and search for Movie Maker, if you don't find Movie Maker in Windows, download it from Microsoft Website. 

Windows Live Move Maker

Open the app, click on the "Add Videos and Photo" icon and locate the video that you want to rotate, double click the file. Now locate the rotate video icons in the Editing section and click the "Rotate left" or "Rotate right" button to rotate the video in 90 degree increments. Save the changes you've made by clicking the "Save Movie" button in the Home tab and choose the desired format. 

#2. VLC :  Open your video in VLC and open the Tools menu > select "Effects and Filters' or press Ctrl + E. Click on the "Video Effects" tab, and then check "Transform" to rotate the video 90 degree. 

VLC video rotation

This change isn't permanent, to save the video in its new orientation, you've to open Tools > Preferences and at the bottom of the preferences windows, enable "All" settings. Now find the heading call "Sout stream" (under Stream Output) then click on "Transcode" and choose "Rotate video filter" from the selections to the right and finally click "Save".


How to Rotate a video in VLC

Click open VLC's Media menu > Convert/Save, click Add and choose the file we just rotated. Click on the "Convert/Save" button at the bottom of this dialog and then "Convert" (Alt+O). Select a destination and file name to which you want to save your new file. Go ahead and click "Start" and the file will be converted and saved.

#3. Download iMovie which is available at Mac App Store and open iMovie, click the file menu, select import and select video. Open the Crop Menu by selecting your video and press "C" on your keyboard or by clicking the crop button in the middle toolbar. You'll see the Rotate buttons appear at the top of the viewer and click the Left or Right rotation buttons to rotate the image in 90 degree increments, click done. 


iMovie video rotate


Note : Use the "Fit" option to ensure that you don't lose any of the edges of your video when it's rotated.


How to Rotate a Video 90 degree on Android or iPhone

There are a variety of free and paid apps available for both iOS, Android Phones and tablets. Some popular apps include, Video Rotate Free, Video Rotate and Flip for iOS and mVideoCut, Video Toolbox for Android. 

Once you've installed the app, open it and select your video file. You can start rotating it, your options will depend on the app you're using, but almost all allow for basic 90 degree increments.

Bonus Tips : You can also use, online video rotating site like RotateMyVideo.net. Click the "Pick Video" button in the middle of the page and select the video on your computer or mobile device. The video is uploading and can take a few seconds or even a few minutes, depending of your connection and size of your video. Click the buttons in the Rotation section (Left or Right arrows) until the video is fixed. Click the "Download" link to download the rotated video.

8 Ways to Play Android Games on Windows PC

Is your child always playing games on mobile for hours together draining the battery of your Android phone. You don't have an Android mobile but want to try an awesome game that you played on your friend's mobile. You don't necessarily need to have an Android device to play Android Games, if you know how to play Android Games on PC you can turn any Windows machine into an Android-based arcade. 


How to Play Android Games on Windows/Mac PC

Emulators acts as the middleman between Android apps and your PC. Android emulators/simulators are largely required to run Android Apps and games on PC (Windows XP, 7, 8, 8.1, and 10). 


How to Play Android Games on PC

#1. BlueStacks : An Android emulator which is free and easy to install. Once you install it, you can run BlueStacks into a separate window at your Windows desktop. It allows you to connect with Google Play Store and install the apps and games. You can also use Cloud connect feature provided by this application which lets you sync the apps from your phone or tablet with the BlueStacks installed on your Computer. To use this feature you've to install BlueStacks cloud connect on your Android mobile, once synced, apps can be installed from the cloud. 

#2. Genymotion : It is quite impressive with its speed and features and the best alternative to BlueStacks. It allows drag and drop installation of apps and games, you can test any app or game in a big screen. It's also support the sensor system and open GL. 

#3. Manymo : It is a browser based emulator and does not require any installation to run the Android apps and games. You can also embed any Android apps or game at any webpage by using this browser based emulator. 

#4. Windroy : Easy to use, one click installable emulator. It directly run on Windows architecture hence considerably faster and supports 3D based games. You can install apps by going to installation directory and placing .apk files in Windroy\windroy_root\data\app folder.

#5. Droid4X : It has some silent features such as it comes pre-rooted with play store installed. It's pretty fast, doesn't lag and allows you to configure your keyboard as a controller. 

#6. Andyroid-Andy OS : This emulator supports some unique features which aren't supported by other Android emulators such as using your phone as remote control while playing games,  ARM support. You can directly install apps in your Andy emulator through your host's desktop browser. Andyroid is an advanced alternative to Genymotion as both of them require VirtualBox to be installed on the system. 

#7. Live Android : A complete OS for Android games and apps which can boot separately in a laptop or desktop computer. You can also it in VMware or VirtualBox to test the Android Apps and Games. 

#8. Android X-86 : The desktop version of the Android OS which can run natively in AMD and Intel processors. You can install just like the Windows or Linux operating system in your X-86 based computers. It supports devices like Del Inspiron Mini Duo, Samsung Q1U, ASUS Eee PCs, Viliv S5, Lenovo ThinkPad X61 Tablet and Viewsonic Viewpad 10. You can also install it on a Virtual Machine using VMware or VirtualBox.

Best Methods to Upload Photos to Instagram From Computer

Instagram is now one of the most popular social site for sharing pictures and short videos. You can run Instagram on popular platforms such as iOS, Android and Windows phone. Instagram launched a web platform in 2013, but it only gives the ability to view your Web profile and others profile, like photos and follow/unfollow.  The app is available for phones, it is not available for desktops including Windows and Mac but there are some ways to upload photos to Instagram. 

Best Methods to Upload Photos to Instagram From Computer

In order to upload Photos to Instagram, you can use any you like to transfer your Photos from your desktop to a mobile device that either runs on iOS, Android or Windows and then upload it through the Instagram app.

1. Emailing yourself the photo then opening and downloading the photos from your phone.
2. Saving the photo on Evernote then using the Evernote app to download it on your phone.
3. Use DropBox, Google Drive or Amazon cloud to create folder on your computer and drop any photos you potentially want to use on Instagram on that folder.
4. Upload your images to Flickr or Facebook from PC and download to your mobile phones.

Note : The above methods are time consuming but safe. 


There are some Apps using which you can upload or post photos to Instagram from Computer like Bluestacks, InstaPic. 

How to upload photos to Instagram by Bluestacks 

Bluestacks app player allows you to run any Android app on your Windows or Mac PC. To upload Photos to Instagram from your PC, download and install Bluestacks App Player on your PC.

How to upload photos to Instagram by Bluestacks

Sign in to Bluestacks with your Google account credentials.
Search the Instagram App and install it. Sign up or login to your Instagram account.  Now choose the photos to be uploaded and Scale and crop the image.  Add filter to image, upload and share.


How to upload photos to Instagram using InstaPic

InstaPic is the first and only fully featured and free Instagram client for Windows devices. The app comes with a suite of Photo editing features like adjusting brightness, saturation, contrast and several more. This app allows users to upload Photos by either selecting from the gallery or using the camera on your laptop or desktops. Once you have selected the photos, you can do all the basic editing you find on the official Instagram mobile app and then apply filters before uploading them. 

Note : There are also some apps like Gramblr, Up-Uploader for Mac, ARC Welder and Instamize, but I don't prefer due to security reasons. Gramblr can get you banned because of misuses of the API, Bluestacks and InstaPic don't use API. If you're using any of the tools that use the API, you can get banned. 

You can use Latergramme to upload and schedule photos and videos from your computer or mobile device, at the time of posting they send you a notification on your mobile device, you just have to click the notification and you're ready to post in Instagram. 

Tell Us, Which Method do you use to upload photos to Instagram from PC.  Drop a line in Comment Box!

Best Methods to Mirror Android Screen to PC or TV (No Root)

Sometimes you might want to connect your smartphone to a bigger screen like a PC or TV to see the photos in bigger display. There are also plenty of other reasons like
  • You might be a developer in the middle of coding and want to check your app without having the constantly reach to your smartphone.
  • You might want to share your picture and videos on a big screen without uploading them.
  • You might need to give a presentation quickly while the projector is connected to a PC.
  • Browse the web on the big screen.

So how do you mirror the Android Screen to PC or a TV without a rooted phone?


Best Methods to Mirror Android Screen to PC or TV (No Root)

Mirror Android Phone to PC

The best way to mirror the screen to PC is to install Vysor Beta made by prolific Android developer Koushik Dutta, if you have phone which is not rooted.

1. Download Google Chrome and the Vysor Beta. Since Chrome works on Windows, Mac and Linux, this app will work on all platform, including Chrome OS. 


Also See :  Best Methods to Root Your Android Phone


2. Connect your Android Phone to your PC by a USB cable and Enable Debugging Mode. To Enable Debugging Mode in Android follow the following procedure

Vysor Chrome Extension


  • Go to Settings > About Phone, Scroll down and tap Build Number seven times.
  • Go back to Settings > Developer Options, Scroll down and Enable USB Debugging Mode.
Recommended : How to install Apps Directly into Your SD card (No Root) 

3. Open Vysor extension on Chrome and click the Find devices, Vysor will detect any smartphone connected to it using the USB cable. Now select your device from the list.

4. Vysor will now install an APK on your Android device and once it is connected, you will be able to see your device screen on your PC. Now you can use your PC keyboard and mouse to control the Android Smartphone.


Also See : How to Manage App permission on Android Mobile or Tablet


There is another option to mirror android phone to PC by using Mobizen app which works in similar way. You need to download and install the desktop and mobile app. Once connected, you can use your phone from the PC. This app also allow you to record the Android screen without rooting.

If you want to wirelessly connect your phone to PC, there is another app called Mirror. The only requirement for this app is that PC and phone should be connected to same Wi-Fi network. Download the AllCast Receiver for Chrome extension and Mirror for Android app on your Smartphone. Now open both apps one on PC and another on Android Phone to Mirror Android Smartphone.


Mirror Android Phone to TV

If you have Wi-Fi on your TV, you can use the default cast screen option available under Settings > Display > Cast Screen. 

Chromecast Cast Screen

Once you switch on the TV and enable cast screen, you will be able to see the TV listed on your Phone. Now you can connect to the TV and view your Android screen in large display.

Recommended : How to Backup and Restore WhatsApp Chats, Media using Google Drive 
You can use Chromecast which is basically a HDMI dongle, if your TV does not have Wi-Fi. Download and install Chromecast app on your phone, insert the Chromecast HDMI dongle to TV. Now connect the phone to Chromecast from the app and from the menu option, you can enable cast screen. 


Mirror has a few Disadvantages

1. You can't interact with your screen through your PC, that means no typing with your computer's keyboard on your Phone.
2. Annoying "Mirror" floating watermark is going to stay and there is no way to remove it at this time.

We have listed the several ways you can mirror your Smartphone screen to your PC, there's just one thing left to answer. 


What do you use to Mirror your Android Phone. Drop a line in the comment box!

How to Format a Write Protected USB stick

If you're stuck with a USB drive or SD card that can't be format or the disk is write protected. You'll find that an USB flash drive or SD card will refuse to format and Windows will tell you that it is write protected, ever through there is no format option. Sometime the things get out of control and you can read the files which are already stored on the drive, but you can't delete them. 


Formatting a USB drive is not different than formatting any other drive. Here are some simple methods you can try to remove write protection and erase or format it. 


Difference between FAT32, exFAT and NTFS

1. FAT32 is the oldest file system and introduced all the way back in Windows 95 to replace the older FAT16 file system. Most of the Flash drive will often come formatted with FAT32 for maximum compatibility across not just modern computers but other devices like game consoles and anything with a USB port. There are some limitation like Individual files on a FAT32 drive can't be over 4 GB in size and lacks the permission and other security features built into the more modern NTFS file system. 

Compatibility: Works with all versions of Windows, Mac, Linux, game consoles, and practically anything with a USB port.

Limits: 4 GB maximum file size, 8 TB maximum partition size.

Ideal Use: Use it on removable drives for maximum compatibility with the widest range of devices, assuming you don’t have any files 4 GB or larger in size.

NTFS FAT32 file size limit


2. NTFS file system was introduced in the consumer version of Windows XP and packed with modern features like support file permission for security, a change journal that can help quickly recover errors if your computer crashes, shadow copies for backups, encryption, disk quota limits, hard links etc. 

Compatibility: Works with all versions of Windows, but read-only with Mac by default, and may be read-only by default with some Linux distributions. Other devices — with the exception of Microsoft’s Xbox One — probably won’t support NTFS.

Limits: No realistic file-size or partition size limits.

Ideal Use: Use it for your Windows system drive and other internal drives that will just be used with Windows. 

NTFS FAT32 compatibility with OS


3. exFAT was introduced in 2006 and was added to older versions of Windows with updates to Windows XP and Windows Vista. It's a file system optimized for flash drives and has very large file size. You can store files that are larger than 4 GB apiece on a flash drive or SD card. exFAT is a strict upgrade over FAT32, and should be the best choice for external drives where you want a lightweight file system without FAT32’s file size limits.Compatibility: Works with all versions of Windows and modern versions of Mac OS X, but requires additional software on Linux. More devices support exFAT than support NTFS, but some — particularly older ones — may only support FAT32.

Limits: No realistic file-size or partition-size limits.

Ideal Use: Use it for USB flash drives and other external drives, especially if you need files of over 4 GB in size. Assuming every device you want to use the drive with supports exFAT, you should format your device with exFAT instead of FAT32. 

How to Format a Write Protected USB stick

In any version of Windows from XP onwards, run Regedit.exe and Navigate to the following key

Computer\HKEY_LOCAL_MACHINE\SYSTEM\CurrentControlSet\Control\StorageDevicePolicies


Double-click on the WriteProtect value in the right-hand pane of Regedit.exe. Change the Value data from 1 to 0 and click OK to save the change. Close Regedit and restart your computer. Connect your USB drive again, and you should find it is no longer write protected. You can now format the drive as normal by right-clicking on it in My Computer and choosing Format.


How to Expand Your Phone Storage with Wireless USB stick

If your smartphone or tablet is running low on storage for your apps, photos, videos, music and other files, perhaps you have received an error message suggesting you have insufficient storage available. When your mobile phone has limited storage and there's no option to add an external SD card. 

sandisk wireless usb stick


To overcome this situation, you have clouded based services like Dropbox or Google Drive that add virtually unlimited storage to your phone but you've to be connected to the Internet to access your files. Another solution for this problem is Use a wireless USB stick from Sandisk that adds storage to your phones and tablets much like a regular USB drive. 

Also See : How to Share Large files over the Internet

How to use Sandisk wireless USB stick

1. Plug the USB device into your laptop or desktop computer and let it charge for about an hour or two.
2. Once the device is charged, you tap the little power button on the stick to turn it on.
3. Now install the Sandisk connect app on your mobile phone and go to WiFi settings on your mobile phone and connect to the WiFi hotspot created by the USB stick.


 Advantage of using Sandisk wireless USB stick

1. You can assess content of the USB drive like stream audio, video files, photos, PDF Files and other document.
2. You can easily transfer files between the phone and the wireless drive. 


Also See : Best Apps to transfer large files between Android and PC using WiFi
3. You have an option to add a USB WiFi password to prevent other nearby devices from connecting the USB stick.
4. Sandisk Connect USB stick requires no Internet connection.
5. Multiple devices can connect to the same USB drive over WiFi.
6. Act as a bridge between the iOS and Android device.
7. Sandisk connect is compatible with both Android and iOS devices and is available in various capacities from 16GB TO 128 GB.


You can buy Sandisk wireless USB stick from Flipkart or Amazon


How to Find Your WiFi Network Password

Your computer is connected to WiFi network and you forget the WiFi password that you had earlier used to connect to this particular WiFi network. Whether you've misplaced your home network's password or you're visiting someone house and don't want to ask them for the password. Maybe you forget the password or maybe the network administrator entered it directly without revealing the actual password to you. You would now like to connect a second device like your mobile phone, laptop, Tablet to the same WiFi network but how do you find out the WiFi Security Key.

You can either send a password request to the WiFi admin or you can retrieve the saved password with some easy steps given below.


Find the Default Password Printed on the Router


Modern WiFi routers offered by many Internet Service Providers comes with a default WiFi network name and password. To find default password, just examine your WiFi router and see a sticker somewhere on it that contain both the Network Name (SSID) and Wireless Security Key (Password).


wifi router default password

Also See : How to Create a WiFi Hotspot in Windows 10


Find the WiFi Password on Windows


To look up a WiFi network password on Windows, open the Control Panel and Click "View network status and tasks" under Network and Internet. Click the name of the current Wi-Fi connection to the right of “Connections”. 


Network and Sharing Center Windows 10


Click the “Wireless Properties”  button in the Wi-Fi Status window that appears. 

WiFi Status Windows 10


Click the “Security” tab and activate the “Show characters” checkbox to view the hidden password.


Find Your WiFi Network Password


You can also use Command Prompt to retrieve your WiFi network Password. Open the command prompt in administrator mode. Type “cmd” in the Run box, right-click the command prompt icon and choose Run as Administrator. Now enter the following command and hit enter to see the WiFi password.

netsh wlan show profile name=digital adda key=clear

Remember to replace digital adda with the name of your Network name or Wireless SSID. The password will show up under the Security Setting section > key content.
 

If you would only like to see the password and not the other information, use the findstr command:
netsh wlan show profile name=digital adda key=clear | findstr Key


Also See : How to access Your Router if You forget the Password


Find the Password on a Mac

Both Windows and Mac allows you to view the current network WiFi password, however mobile devices like Android smartphones and Apple's iPhone and iPads don't allow you to view your Current WiFi network password.

To find the Wi-Fi password on your Mac, press Command+Space to open the Spotlight search dialog, type “Keychain Access” without the quotes, and press Enter to launch the Keychain Access app.


Mac keychain Access

Locate the name of your Wi-Fi network in the list, click it, and then click the “info” button — it looks like an “i” — at the bottom of the window.


Click the “Show Password” checkbox in the window that appears. You’ll have to enter your username and password to gain access to the password. You’ll need an administrator account for this.Click the “Show Password” checkbox in the window that appears. You’ll have to enter your username and password to gain access to the password. You’ll need an administrator account for this.


Find WiFi password in Mac

You can also use Terminal to retrieve WiFi network password. Open Spotlight (Cmd+Space) and type terminal to open the Terminal window. At the command line, enter the following command (replace baatkar with your WiFi name), then enter your Mac username and password to access the OS X keychain and the Wi-FI network password would be displayed on the screen in plain text.

security find-generic-password -wa baatkar


Find the WiFi Password on Linux

Open the terminal and enter the followind command (replace baatkar with your WiFi network name). The value of the field psk is your WiFi password.

sudo cat /etc/NetworkManager/system-connections/baatkar | grep psk=


If you don’t know the network name, use the following command.

sudo grep psk= /etc/NetworkManager/system-connections/*


Start WLAN AutoConfig 

If you are using this technique to retrieve the WiFi password on a Windows computer but getting an error that says – “The Wireless AutoConfig Service (wlansvc) is not running” – here’s a simple fix:

Click the Windows Start button and type “services.msc” in the Run box to access Windows Services. Here go to the WLAN Autoconfig service and make sure that the status is Running. Else right-click the WLAN AutoConfig service, select Properties and go to Dependencies. Check all the dependencies to make sure they are all running.


Reset Your Router to its Default WiFi Password


If you don't find your WiFi network password and don't have access to your router's web interface, You can reset your router and force it to use the default WiFi password printed on the router once again.

Look for a small “reset” button on the router. It’s often a pinhole button you’ll have to press with a bent paperclip or a similarly small object. Press the button down for ten seconds or so and your router’s settings will be completely erased and reset to their defaults. The Wi-Fi network name and password will be restored to the default ones on the router.